How can we help you today?
Setup Azure AD/Entra ID for MyWorkDrive
Azure AD/Entra ID for MyWorkDrive Setup Guide
MyWorkDrive 7 Server or higher Required:
MyWorkDrive Server supports native Azure AD/Entra ID for user authentication as an alternative to Active Directory. Authentication works by utilizing an Entra ID App registration with permissions to view users and groups in active directory.
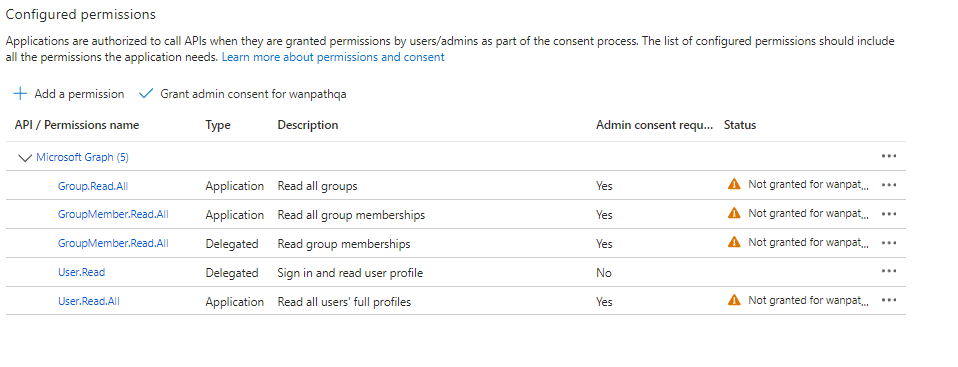
The permissions recommended for your app in Azure in the chart below support the common functions MyWorkDrive accesses in Azure
Entra ID Identity
Data Storage for OneDrive/SharePoint – either as storage or as use in Office Online Editing
Office Online Editing
Azure Storage
MyWorkDrive server may be configured to trust and use our shared MyWorkDrive Auth app registration or use a custom Tenant Only App Registration. In our Server post Setup Wizard we offer the option of using our Shared MyWorkDrive App Registration, creating a custom registration for you, or canceling the wizard entirely and creating your own App registration manually.
Contents
Option 1: MyWorkDrive Auth App Registration
When utilizing the MyWorkDrive Cloudflare Web Connector (*.myworkdrive.net web address), the MyWorkDrive managed App Registration will be presented as an option.
With this option you will be prompted by the wizard to Sign-in as an Azure AD/Entra ID Global admin account.
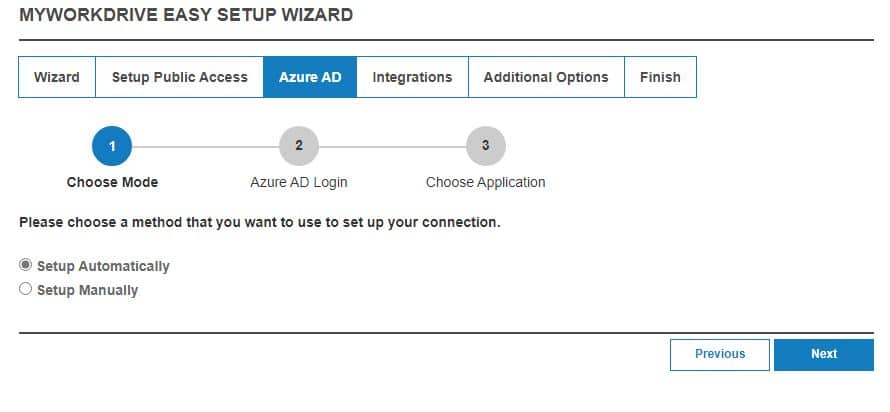
In the next step login with an Azure AD Global Admin to continue automated setup.
To sign in, follow the prompts to sign in using the Microsoft device login method and enter the code (you may copy the code to the clipboard for ease of entry) as presented during setup:
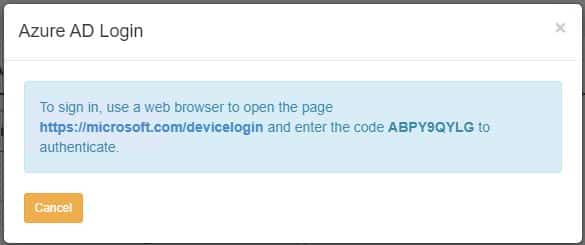
Authenticate with your Azure AD/Entra ID Global admin account when prompted, then click continue to sign in the Microsoft Azure CLI and close the page when requested to continue to the next step:
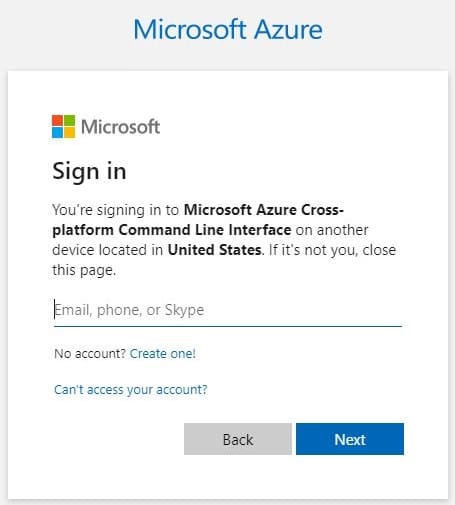
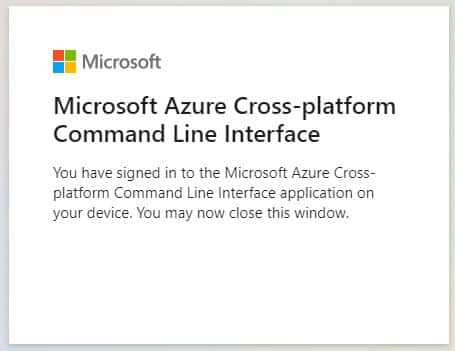
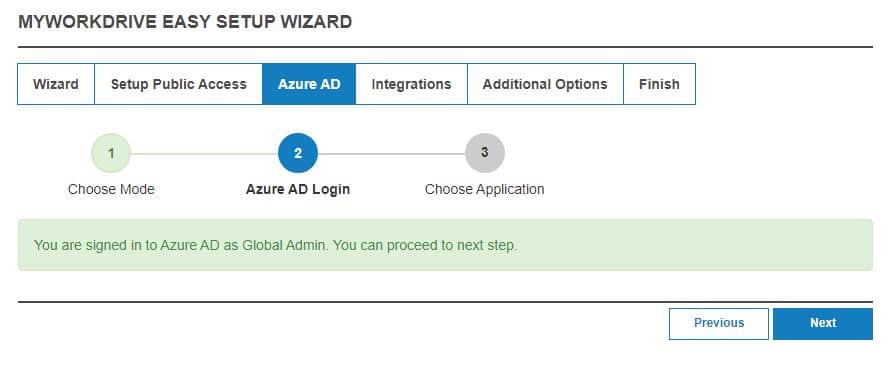
After a few moments the MyWorkDrive Admin panel will recognize you are logged in with an Azure AD Global Admin:
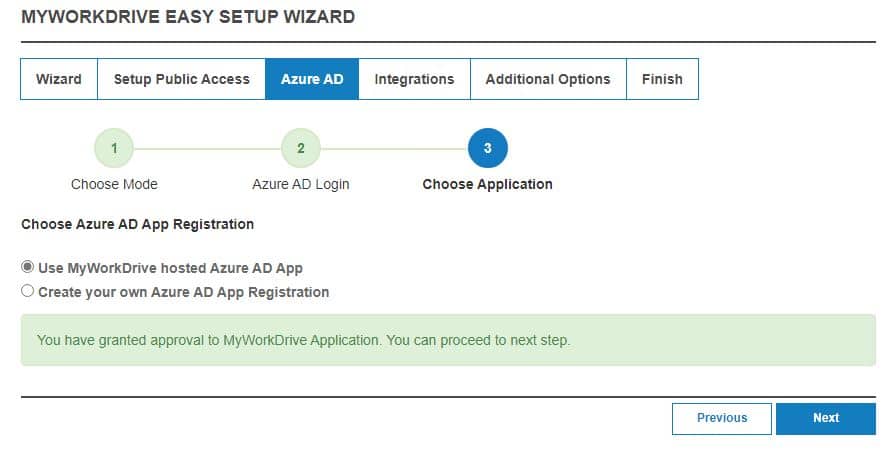
You with then be provided with the option of using the MyWorkDrive hosted Azure AD App:
Leaving that option selected, approve the MyWorkDrive hosted app registration.
Option 2: Custom Azure AD App Registration (automated setup)
With this option you will be prompted by the wizard to Sign-in as an Azure AD/Entra ID Global admin account.
You will be approving the The “MyWorkDrive App” Azure AD which has Microsoft Graph API permission to create/read/write Azure Ad Apps on your behalf.
Note: The temporary “MyWorkDrive App” may be removed from Entra AD once setup is complete (Located in Entra ID Enterprise Applications).
Begin by following the wizard to login to Azure AD and setup Automatically:

In the next step login with an Azure AD Global Admin to continue automated setup.
To sign in, follow the prompts to sign in using the Microsoft device login method and enter the code (you may copy the code to the clipboard for ease of entry) as presented during setup:

Authenticate with your Azure AD/Entra ID Global admin account when prompted, then click continue to sign in the Microsoft Azure CLI and close the page when requested to continue to the next step:


After a few moments the MyWorkDrive Admin panel will recognize you are logged in with an Azure AD Global Admin:

You with then be provided with the option of creating your own Azure AD App:
Deselect the Office 365 and Azure Storage options (not shown in this image) if you do not intend to use those features.
If you select those features but they are not available in your tenant, or you do not have permission to grant consent for them, you may not be able to complete the wizard.
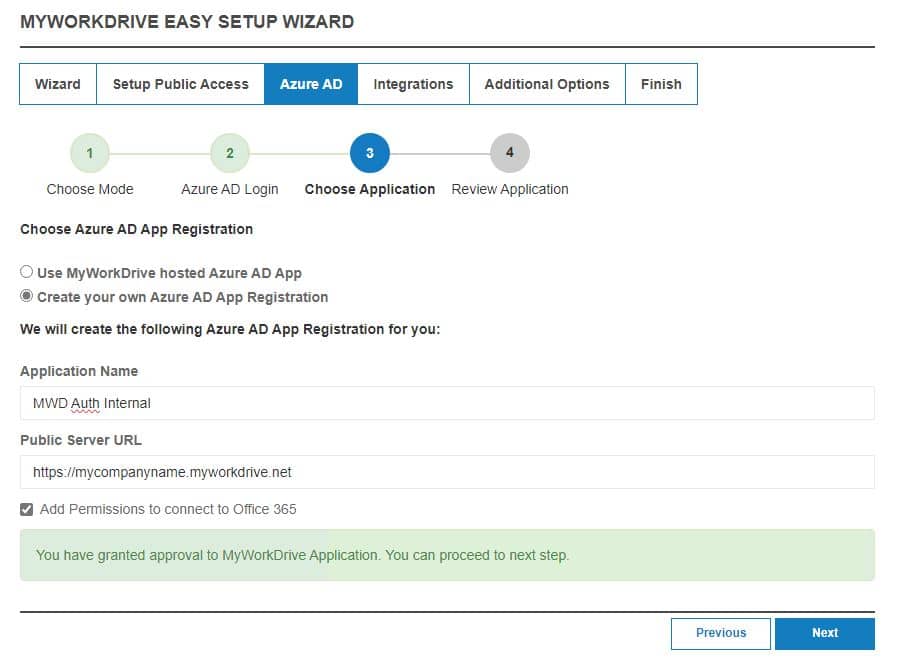
Leaving that option selected, once created, backup then approve the MyWorkDrive hosted app registration that we created for you in your tenant:
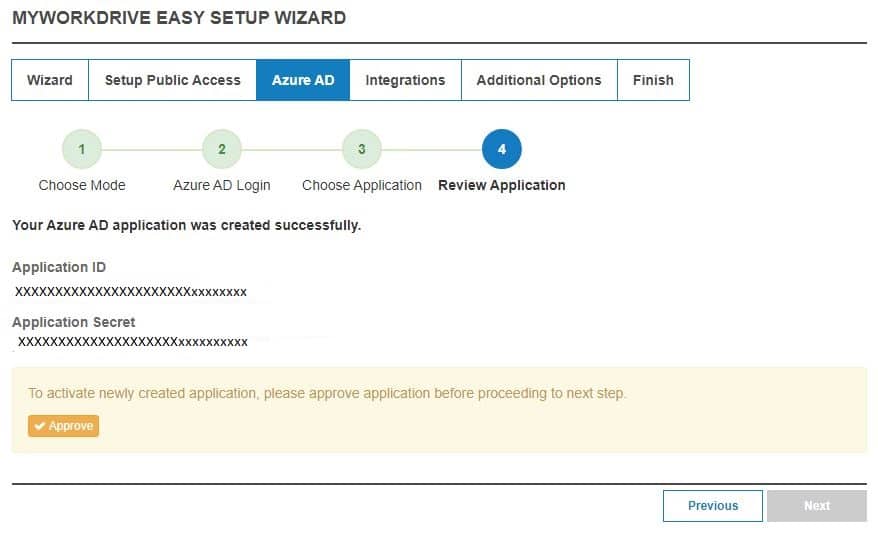
Make note of the Application ID and securely store your Application Secret for future reference.
Option 3: Custom Azure AD App Registration (manual setup)
Your organization will need their Azure AD Global Admin to create an Azure AD App registration with the necessary permissions noted at the beginning of this article.
Create a new Azure AD App Registration in the same Azure AD as your user’s Office 365 Subscription.
On portal.azure.com, login using Global Admin Account. Bring up Azure Active Directory/Entra ID https://portal.azure.com/#blade/Microsoft_AAD_IAM/ActiveDirectoryMenuBlade then Click App Registrations.
Create New Registration
Provide a Name, Selected Account Types and insert your public MyWorkDrive URL
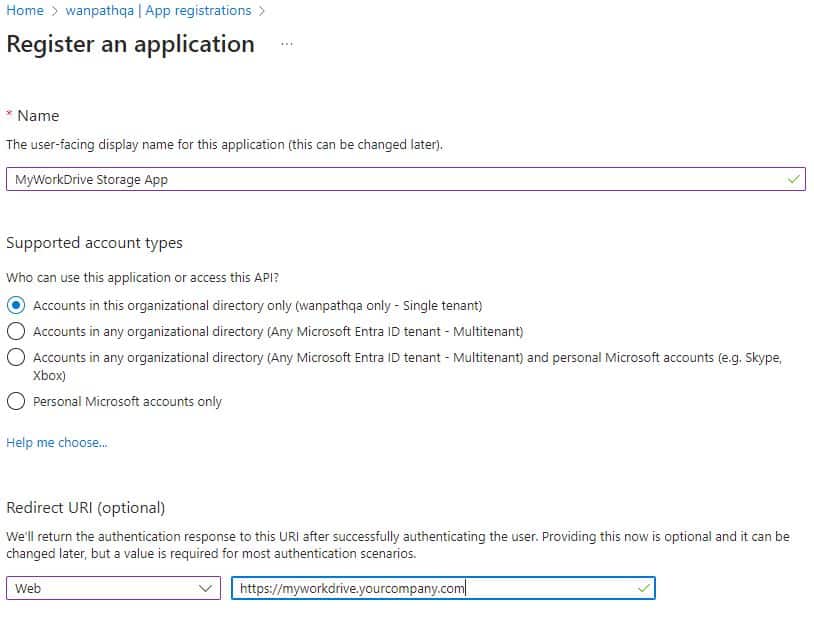
Click Register
API Permissions
Click API permissions,
If you are using all the features of MyWorkDrive, Add the permission below:
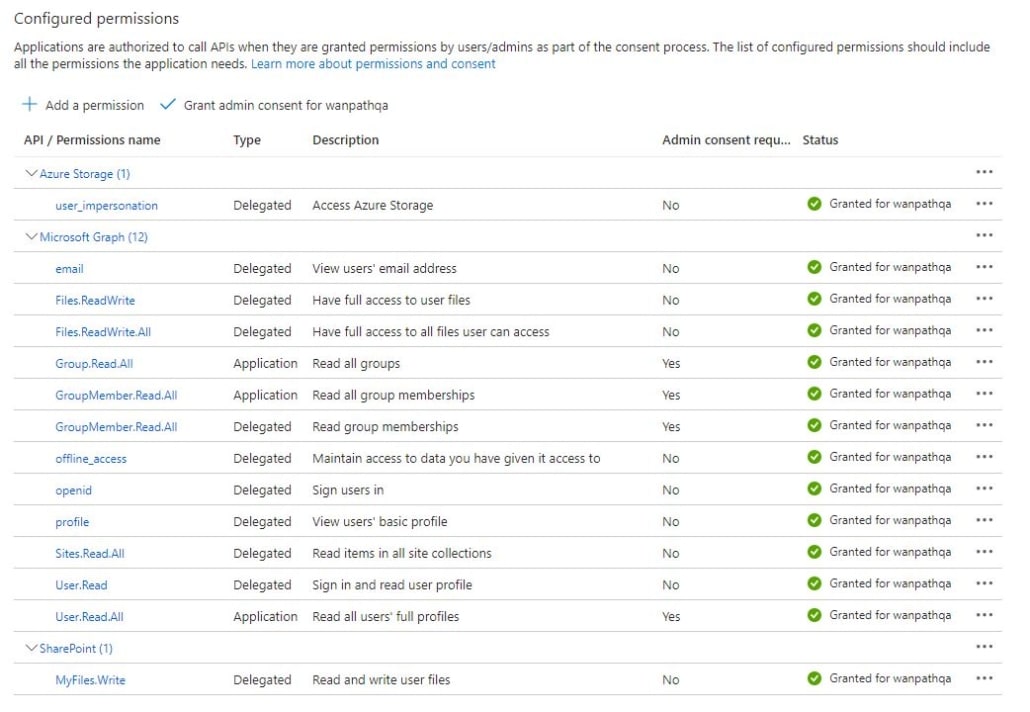
You may omit Azure Storage |user_impersonation if you do not intend to use Azure Storage with EID Auth, and will either not be using Azure Storage, or will be using it with Connection string.
You may omit SharePoint | MyFiles.Write if you will not be using Office 365 Online Editing.
If you just wish to use MyWorkDrive for Identity only, with no additional features in Azure (SharePoint/OneDrive storage, Office Online Editing, Azure Storage), then only these five permissions are required.
Create Client Secret: Certificates & Secrets: New client secret
Note and Calendar Secret Expiration Date as it will need to be regenerated at that time and updated on all MyWorkDrive Servers.

Click Authentication: Enable Access Tokens and ID tokens.

Copy the Client Secret Value (not the secret ID): Keep this backed up and secured as it will only display briefly.
Click Overview: Copy the Application (client) ID: Retain this value for use in the MyWorkDrive Admin Panel.
Copy the Directory (tenant) ID: Retain this value for use in the MyWorkDrive Admin Panel.
*Note the Client Secret Expiration – this will need to be renewed before it expires and updated on each MyWorkDrive Server in the future.
Update Branding on your custom Azure AD App Registration to verify app or add Company Logo as desired.
MyWorkDrive Server Configuration
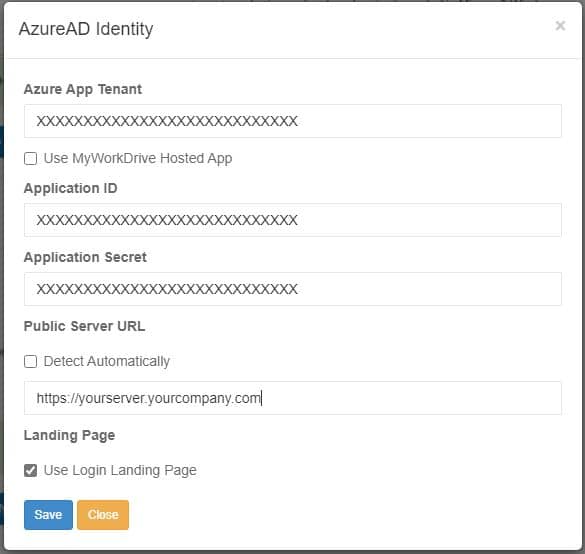
Under Integrations or during the Wizard when prompted, Paste the values of your Tenant ID, Application ID, Application Secret and Your Server URL into Azure AD Integration:
